
You Might As Well Start Now!
I went from repairing a 55 cent switch to diving head first into creating and registering a DNS Name, Raspberry Pi web hosting, Pi WebCam and PiCam servers, Pi Audio servers, and learning WordPress. How the fuck do I talk myself into doing this? Ok, well, truth be told I had intended on doing this for years but that nagging little voice in my Aspie brain told me, “You might as well start now!” Yeah, it yells most of the time; it doesn’t understand boundaries.
As many of you can relate, there are tons of shit men can do with their spare time. I prefer learning things and then doing things. Sometimes the “doing things” happens first, and sometimes this means I have to learn a bit more than I wanted to learn in the first place. “How do I fix what I broke while I was trying to fix what was wrong?” “If it is working right, is it supposed to smell or rattle like that?” Now I am sure that there are a lot of places on the Internet that are going to try to show you a hundred ways of doing things, but I thought there needed to be a hundred and one. So, when I got fed up with dealing with a trackball button that didn’t drag the way it used to, I decided that it was time to use my phone and other gear I had to fork out money for (some more recent than others) to get this shit show started. And that was honestly almost the name of the project. But I figured I would exercise a microscopic bit of decorum. Don’t worry, I buried it and spread salt on it so it won’t grow.
Right, I’m not going to talk about the trackball, if you want that story, go watch the video and associated post. I have an affinity for Raspberry Pis. I tried doing something like this when Pi 3s were out but they couldn’t handle the frames per second to stream decent video. This was at the start of the plan-demic, after that, the high costs made trying the Pi 4s out of the question. A few years later, when some bit of common sense and reason reestablished itself, I tested the waters with a Pi 5 after the price dropped a bit. They aren’t perfect but they are better than running webcams across my shop and less expensive than networked cameras. Webcams need a dedicated USB connection for each one, and they don’t work well on hubs. Decent IP cams need an external power source (more wall warts and cables), plus WiFi doesn’t work well for video. If I am running CAT5e cable why not just use something that can handle PoE (Power over Ethernet). Bring in the Raspberry Pi 5 8GB with a PoE HAT (just refer to it as “RPi”, snooty little bitch).
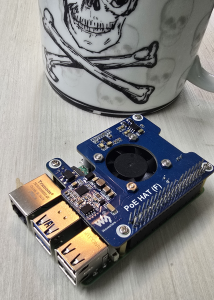
Powered by caffeine, alcohol, determination, and other forms of inspirational compounds, I dragged out books and AI to hammer out Pi images that will each act as a web host server, a PiCam server, a WebCam server, and an audio server. Now you may ask yourself, “Dude, that sounds like a lot of Pis, why didn’t you just use a computer or laptop?” Well, it comes down to a few things: Low cost, stability, power, portability, security, repeatability (so I can scale up), and functionality. I can program a Pi to actuate stepper motors and servos, which will be very important in the future of my shop streaming. The software is free, I love free. For all of these you are going to need to install Raspbian, Python, and more. With less than $150 I can add a Pi/HAT/PiCam that will do more than an IP Cam, and that price will drop. I love playing with Pis (although I am sure I don’t know as much as I want to), especially when I can power them with just an Ethernet cable.
All pricing is 2025:
RPi 5 8GB = $90.
PoE HAT = $29.
Raspbian (the operating system for the RPi) = Free (Yay!).
Python = Free.
It’s been several months
Before doing any of this, I would recommend that you get comfortable with making backup images with Raspberry Pi Imager to a flash drive or NAS. Letting it sink in that if you blow shit up it can all be restored, just take notes on what worked. I used Grok for quite a bit of this and with its upgrades it can track what worked and what didn’t. I did have to remind it of a few items it forgot when I wrote all this up (No, AI is not perfect). Also, for all of these builds I used a Raspberry Pi 5 8GB with a PoE HAT (again, referred to henceforth as RPi) so that I can power it with one Ethernet cable using a PoE-supporting switch. I’m not sure that ramping up to 16GB would matter, but I’m sure that going down to 4GB is going to screw you in the performance, especially when you are dealing with video.
Web Hosting: I picked Caddy for the actual web server. It works well with WordPress, PHP/Python, and OBS Studio (Open Broadcaster Software). I had to tweak a lot of things including upload media file size and performance settings to get things nice. I also had to come to some hard realizations. I wasn’t going to be able to live stream from my own web server, at least not yet. I don’t want to spend the monthly mulch for a service to do it either, plus I am about 9 years (target date: 2034 or early 2035) away from making the shop open full time and to outside visitors. (If I am still doing this, I am hoping the whole process will be shared, including the move and set up.) Also, I wasn’t going to be able to broadcast or record using OBS on a RPi either. Seems even a RPi 5 can only handle so much input and encoding. While it can handle one, maybe two, PiCams piping into it while broadcasting and recording through OBS, it ain’t gonna handle 4 or 5 additional ones on other RPis, plus an audio RPi server, streaming into it. Everything went to shit especially the frame rate.
Sooooo, I still use a large, high-powered Windows workstation (self built, duh) to do the receiving, recording, streaming, and editing using OBS and other apps to merge and splice things into something halfway decent to watch. Hell, mostly it is just me on a Samsung S24 Ultra and a nifty Bluetooth mic my wife got me for my birthday, taking pictures and recording video to copy to the big computer. More work and polish need to be done on all that.
Setting up WordPress and working within it are two areas that need quite a bit of thought and planning (and rum). Themes orchestrate the look of the page; multiple templates make up a theme. There are many free themes available for download; I used the default “2025”. Certain pages have special functions, like Blog, which is fed by posting Posts (like this one), Home/Front Page, and Privacy Policy. Each different template is set up to be edited and some to act as special types of tools. I’m sure there are more that I’m not covering, but it is a starting point. I would recommend a book “WordPress for Beginners 2025” by Dr. Andy Williams to get some understanding of how WordPress works and what can be done.
You can have video and audio files shared on the site you build, but you will need to jack up the max media upload size in the PHP.INI file. “Hey, WordPress, you might wanna make that doable through the Dashboard!” Yeah, right, like that is gonna happen. After you update the PHP.INI file, you have to restart both whatever version of PHP and whichever web hosting server (remember I mentioned Caddy) services you are running. I can dream. The issue there is storing the actual files. If you are going to do long-form content (generally more than a few minutes) with high-quality videos, size becomes a severe problem and streaming will tank your bandwidth. It is better to load that up to a platform that deals with that stuff for free, but by all means short-form content you can house locally as well as uploading. That still might be a hundred MB though so keep that in mind. Once you get the content uploaded, find the link on the platform(s) of choice, and include it in your localized blog post. Don’t forget tags and categories and search engine hashtags and lighting a candle in the window. #WhoreYourselfOut
There are several WordPress “Plugins” you are going to want to install once you get it running. Several suggestions:
Akismet Anti-spam: Spam Protection.
Really Simple Security: For free SSL security.
UpdraftPlus – Backup/Restore: For…..ummm…..I don’t remember.
WP Mail SMTP: So you can annoy people with emails.
WPForms Lite: So people can sign up to be annoyed.
Pricing:
Caddy (web hosting software) = Free.
WordPress from WordPress.org = Free.
Yeah, all the software was free, but they have pay options for more features.
Move on Mr. Dumbass, they’re getting bored.
Also, this is the way I did it. I’m sure if I had more expertise and money and time and resources there would be a better way.
Casting video with RPi: I’m going to cover two methods and you can decide which way you want to throw your money into. One method (WebCam) is initially less time-consuming, a little more robust, but more costly and more interactive each time you want to fire it up. The second (PiCam) takes a bit more initial set-up, cheaper, but when you turn on the RPi it is good to go and starts immediately. Note: I am not a big fan of headless RPi installs. This might change down the road but I like to play with the desktop more directly, there is a reason we aren’t using DOS anymore.

Using WebCams: This has the plus of also incorporating audio directly at the source of the video-shooting. Since I am going to have multiple streams going at once and I only want one audio track, this is not desirable in most cases, but it is fairly easy. Install OBS, plug the WebCam into the USB port of the RPi, make sure OBS can see the WebCam (Logitech C920 Pro works great) as a “Video Capture Device”, test it, and then tweak it if needed to use hardware acceleration via FFmpeg within OBS. After you configure OBS to capture what the WebCam is seeing (and hearing), OBS then needs to send the stream to its own version of a web server (again I used Caddy). Your receiving OBS software then needs to be set up to use the ported IP address of the WebCam RPi to use the stream to restream or record. Don’t worry, this is all a one-time setup (I hope) and when it is all said and done, you can take a snapshot of the entire thing, write it to an image file, and reuse it over and over again. You will have to tweak it for the new IP address though.
The downside is the cost (see below) and that when you start up the RPi you need to launch OBS and then activate the actual streaming process within OBS. Running OBS does add to the overhead of the RPi. I would suggest sticking with H.264 with the “Ultrafast” presets to help with the CPU load. Again, using AI (Grok) to assist in finding the right settings and software helps to get things right, but it is going to take a lot of trial and error and error and more errors.
Pricing:
Logitech C920 Pro = $100.
As before all software is free.
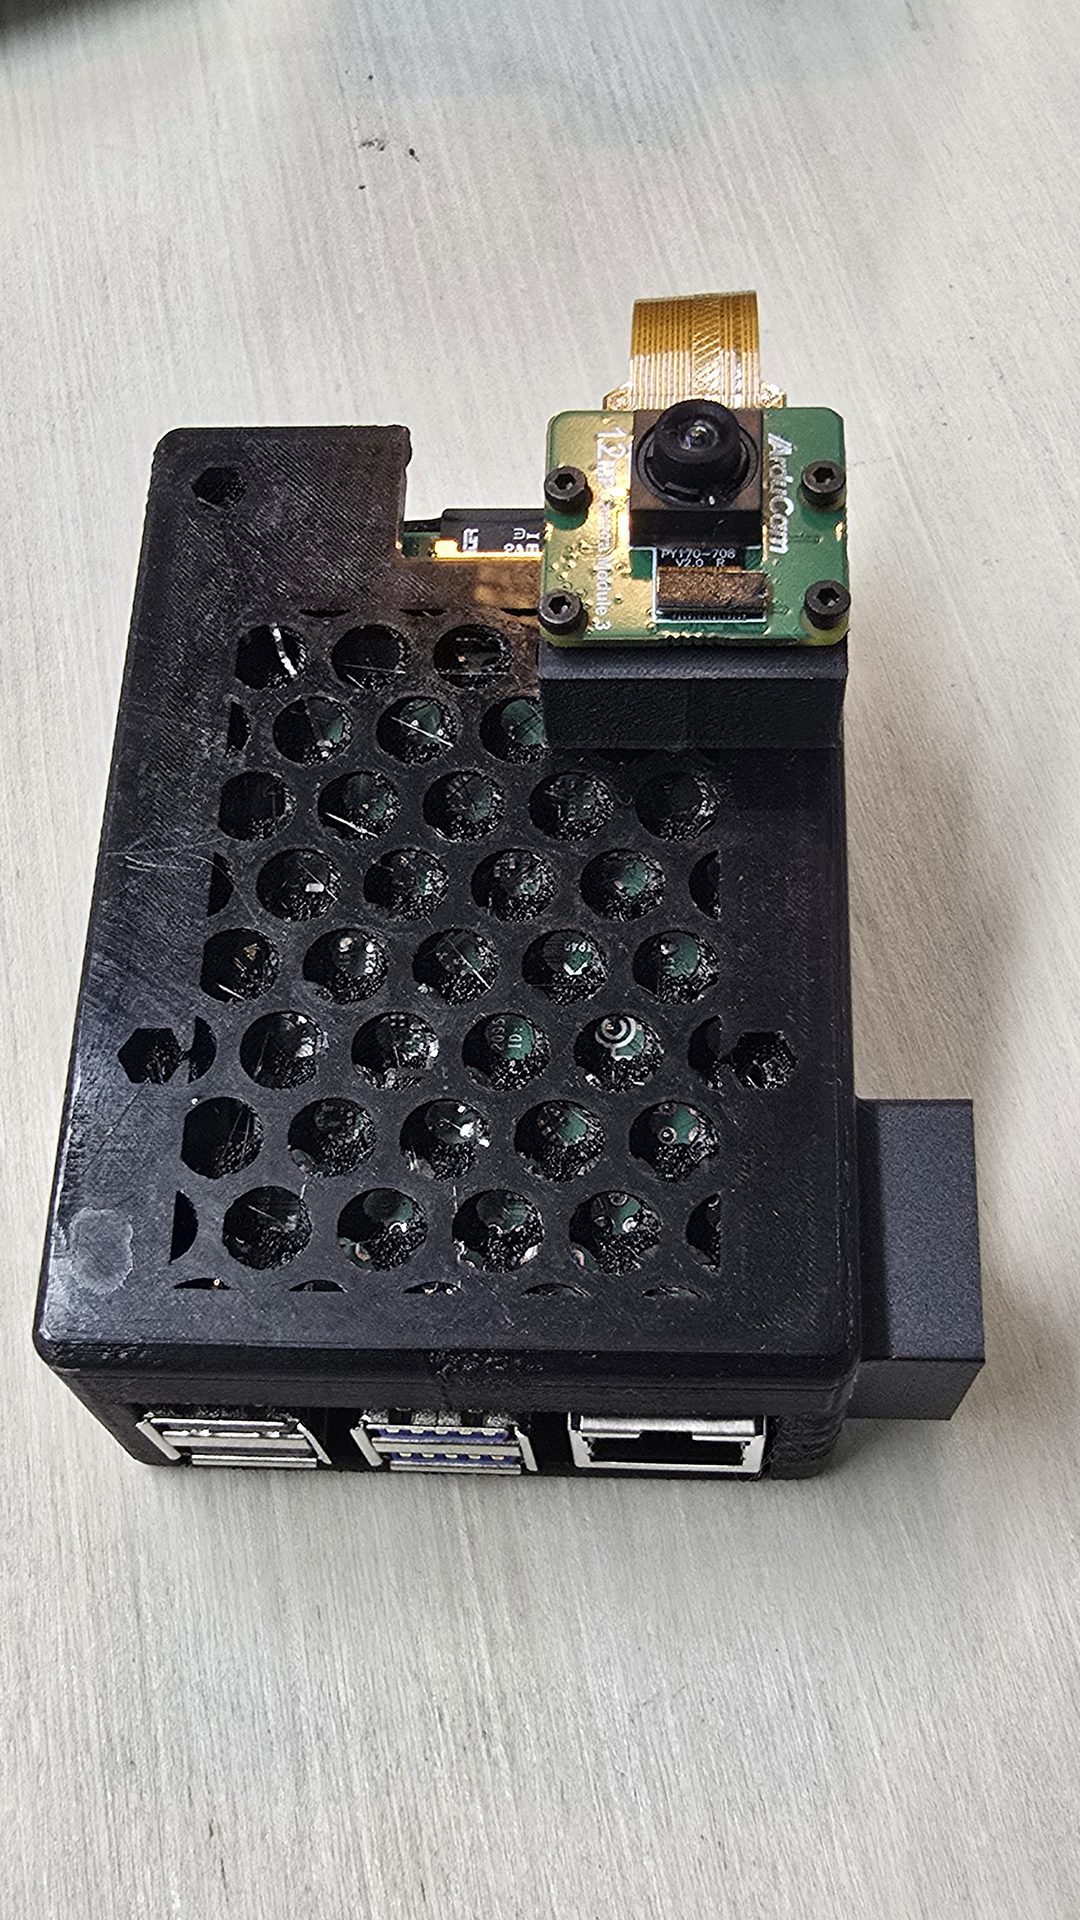
Using the PiCam: This setup is a little more complex because you don’t have OBS doing the gathering and supplying, but the bonus is that as soon as the RPi is plugged in and running you are off to the races. The PiCam plugs directly into the camera port on the RPi (READ THE FUCKING PICAM DIRECTIONS ON HOW TO PROPERLY CONFIGURE IT!). Then you can install PiCamera2 and Flask as a lightweight MJPEG streaming server. Again there is going to be a lot of configuration and trial and error,…..again using AI or however you want to get your answers is going to save you SOME bald patches. While Flask can stream your video so that OBS on a main system can pick it up, you can also use Caddy if you want to present it in the WordPress layout when people visit your site. This is the route I took. At some point I’ll have multiple RPis with PiCams live streaming through the site, most likely with reduced resolution, but who knows by that time Raspberry Pi 7s or 8s might be out. It may be that each camera will have its own page or I’ll combine them all on one page and you can dig out your magnifying glasses. Most likely, I’ll do both; because that is what the big swinging dicks do for ya.
Pricing:
PiCam Module 3 = $23.
There are MANY more different types of PiCams that you can explore, night vision, walleye, wide view, macro, ultra-high res, etc…..Go nuts!
Software = Free.
Lastly, audio.
EH? What? I can’t hear ya!
Audio server: Fuck it, this is a little…..niche I guess. Ok, I’ll explain the issues and the future possibilities/issues and you can do with it whatever in the hell you want. This is just how I am going to solve my audio issues. (My other issues are going to have to wait a looooong time.) To start off, I need to point out that if you can set things up so you don’t have to use wireless, you are going to be ahead of the game in quality. Never use wireless where wired will work.
Currently I have a basement workshop. In one corner, weighing in at approximately 400 pounds is my desk (which is covered by 10 to 15 different projects), two 40″ screens, two workstations, one server, and two NAS (network-accessible storage) drives, my Internet router plus an extra PoE switch, not to mention a 3D printer, one medium-sized network laser jet that needs new toner/drum cartridges, and a flatbed scanner. Also, all the crap I need to currently do online streaming and photo work and blah, blah, blah, you get the idea.
In the rest of the basement, beyond my maple workbench, bench tools, and stacks of partially used filament (and 75 partially started projects), there appears to be a thin wood-paneled wall that is impervious to Bluetooth penetration. This wall also splits my shop in half. So whenever I am talking to someone on the phone, or on the computer, using Bluetooth, I don’t need to tell you what happens. 50%…..say…..do….’t…..get…..ard,…..no…..ca…..ear me. “DAMN IT, wait a minute. I left my phone on the desk.” So to at least get around this during casting and recording times, I devised an audio streaming server, again with RPi. I figure if I mount it on the door jamb between the two rooms, I can at least receive the audio.
Now, to be honest, I haven’t tried this out too much but it works at my desk through OBS. If it works here, it should work within range of my basement when properly placed in the doorway connected to a powered Ethernet cable. Then, when things change, it should be able to handle an area of 33 feet plus if nothing gets in the way.
Fine, by what magic was this done? Well, I’ll tell you. Again, RPi, but this time I had to initially set up the headset to be used in the Desktop interface of Raspbian, then configure DarkIce to capture and encode the audio of the Bluetooth device. Yes, I am sure you can hammer through this on the command line through a list of shell commands. After you use DarkIce to capture the audio, use IceCast to broadcast it over to an IP address so I can pick it up and use it in OBS. And, yet again, AI or web searches can help immensely in setting up both services to properly get the job done.
In addition to this, if I wanted to stream my nasally voice directly to an outside website or WordPress, without using OBS, I could also use Caddy to stream that content as well. Not an interest of mine.
Pricing:
Greatly depends upon the Bluetooth headset you want to use. My preference is a Logitech H760, but they aren’t made anymore. Not only that but they are flimsy and break if you aren’t careful but I do like the style and function.